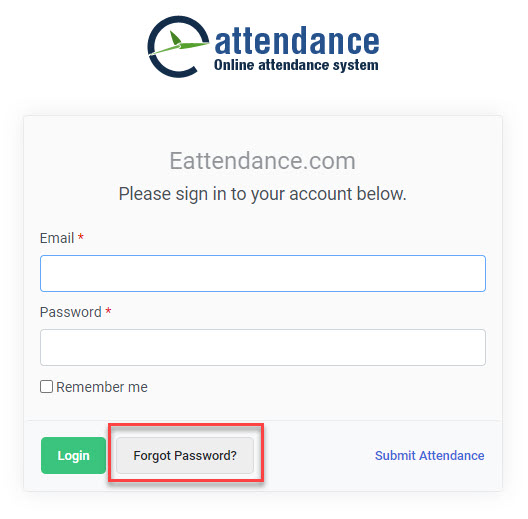
Follow these steps to login into attendance system.
- Go to web browser
- Type your URL http://company.eattendance.com in the address bar
- Press Enter
- Type Username and Password
- Click Login
Follow this instruction to change password of attendance system
- Go to Change Password
- Type old password
- Enter new password
- Retype new password to confirm password
- Click Save
- In login page, click Forgot Password
- Type your email address
- Click Send Password
To Check Daily Attendance:
-
- Navigate to Attendance > Daily Attendance:
- Click on the "Attendance" option in the main menu, then select "Daily Attendance" from the submenu.
- Specify Filter Criteria:
- On the "Shingle Day" tab choose the branch, department, shift, designation, grade, mode, status and type as needed to filter the data.
- Define Date:
- Select the date for the reporting period by specifying the date .
- Choose the desired year from the available options.
- View Details:
- Click on the "VIEW" button to generate and display the daily attendance report based on the selected criteria.
- Navigate to Attendance > Daily Attendance:
To view the Official Visit Posting:
-
- Navigate to Leave & Visit> Official Visit Posting:
- Click on the "Leave & visit" option in the main menu, then select "Official Visit Posting" from the submenu.
- Specify Date and Filter Criteria:
- Choose the start and end dates for the reporting period by specifying the date range from-to.
- Select the office name, person name, designation, grade, mode, status, type, and job level as needed to filter the data.
- View Report:
- Click on the "VIEW" button to generate and display the official visit posting based on the selected criteria.
- Navigate to Leave & Visit> Official Visit Posting:
The Daily Absent Summary Report offers a detailed overview of employee absences for a specified time frame. To access and review this report:
-
- Navigate to Attendance > Daily Absent:
- Locate and select the Daily Absent option within the Attendance menu.
- Specify Date Range and Filter Criteria:
- Define the start and end dates to set the reporting period.
- Choose the person name, branch, department to focus the report on specific individuals, branches or departments.
- View Report:
- Click the "VIEW" button to generate and display the Daily Absent Report, providing insights into employee absences for the selected time frame and criteria.
- Navigate to Attendance > Daily Absent:
To add a new branch, follow these steps:
-
- Settings:
- Navigate to the Gear icon on the top right, then select it to open settings menu
- Navigate to General Settings > Branches:
- Click on the General Settings menu and it will expand the submenu and click on "Branches".
- Click New:
- Select the "New" option to add a new branches.
- Select the "New" option to add a new branches.
- Enter Branch Name:.
- Provide the name for the new branch in the designated field, also add time zone and location.
- Save Changes:
- After entering the details, click "Save" to add the new branch.
- Settings:
- Employees have access to their personal leave records, providing a comprehensive overview of their leave history.
- Employees can review details such as the types of leave taken (e.g., vacation, sick leave, personal leave), dates of leave, and any remaining leave balances.
- This feature allows employees to track their leave usage over time, ensuring they are aware of their available leave allowances and any accrued or pending leave.
- By maintaining a clear and transparent record of personal leave, employees can effectively plan their time off and make informed decisions regarding future leave requests.
- Navigate to Personal Leave Record:
- Access the "Personal Leave Record" section from the main menu.
- Select Parameters:
- Choose your name or the name of the person for whom you want to view the leave record. (It will be available if you have permission to view data from other offices.)
- Specify the desired year and leave name for the leave records.
- Generate Record:
- After selecting the parameters, click on "View".
.
Editing a Branch:
-
- Navigate to General Settings > Branches:
- Access the General Settings menu, then select "Branches".
- Click Edit:
- Find the branch record you want to edit and click on the "Edit" option.
- Make Necessary Changes:
- Update the branch name or any other details as needed.
- Save Changes:
- After making the necessary changes, click "Update" to save the updated information.
- Navigate to General Settings > Branches:
- Navigate to Personal Attendance:
- Access the "Personal Attendance" section from the main menu.
- Select Parameters:
- Choose the person's name for whom you want to view the attendance report. (It will be available if you have permission to view data from other offices.)
- Specify the desired year and month for the attendance records.
- Generate Report:
- After selecting the parameters, click on the "View Report".
- Review Attendance Records:
- Users can view details such as attendance dates, shift hours, overtime, and any other relevant information recorded for each day.
- Navigate to General Settings > Branches:
- Access the General Settings menu, then select "Branches."
- Click Delete:
- Find the branch record you want to delete and click on the "Delete" option.
- Confirm Deletion:
- Confirm the deletion by clicking "OK."
- Go to Holidays
- You can see the holiday list
Adding a New Department:
- Navigate to General Settings > Departments:
- Access the General Settings menu, then select "Departments."
- Click New:
- Select the "New" option to add a new departments.
- Enter Department Name:
- Provide the name for the new department in the designated field.
- Provide the name for the new department in the designated field.
- Save Changes:
- After entering the department name, click "Save" to add the new department.
To view the Official Visit Summary Report:
- Navigate to Leave & Visit > Official Visit Summary:
- Click on the "Leave & Visit" option in the main menu, then select "Official Visit Summary" from the submenu.
- Specify Date and Filter Criteria:
- Choose the Year.
- Select start and end dates for the reporting period by specifying the date range from-to.
- Select the official visit name, person name, designation, grade, mode, status, type, and job level as needed to filter the data.
- Choose the Year.
- View Report:
- Click on the "VIEW" button to generate and display the official visit summary report based on the selected criteria.
Editing a Department:
-
- Navigate to General Settings > Departments:
- Access the General Settings menu, then select "Departments".
- Click Edit:
- Find the department record you want to edit and click on the "Edit" option.
- Make Necessary Changes:
- Update the department name or any other details as needed.
- Save Changes:
- After making the necessary changes, click "Update" to save the updated information.
- Navigate to General Settings > Departments:
To view the Leave summary:
- Navigate to Leave & visit > Leave Summary:
- Click on the "Leave & visit" option in the main menu, then select "Leave Summary" from the submenu.
- Specify Date Range and Filter Criteria:
- Choose the Year and Select the office name, person name, designation, grade, mode, status, type, and job level as needed to filter the data.
- Select start and end dates for the reporting period by specifying the date range from-to.
- View Report:
- Click on the "VIEW" button to generate and display the leave summary report based on the selected criteria.
- Navigate to General Settings > Departments:
- Access the General Settings menu, then select "Departments."
- Click Delete:
- Find the department record you want to delete and click on the "Delete" option.
- Confirm Deletion:
- Confirm the deletion by clicking "OK."
The Daily Absent Report offers a detailed overview of employee absences for a specified time frame. To access and review this report:
-
- Navigate to Attendance > Daily Absent:
- Locate and select the Daily Absent option within the Attendance menu.
- Specify Date Range and Filter Criteria:
- Define the start and end dates to set the reporting period.
- Choose the office and person name to focus the report on specific individuals or departments.
- View Report:
- Click the "VIEW" button to generate and display the Daily Absent Report, providing insights into employee absences for the selected time frame and criteria.
- Navigate to Attendance > Daily Absent:
Editing a Designation:
-
- Navigate to General Settings > Designation:
- Access the General Settings menu, then select "Designation".
- Click Edit:
- Find the designation record you want to edit and click on the "Edit" option.
- Make Necessary Changes:
- Update the designation name or any other details as needed.
- Save Changes:
- After making the necessary changes, click "Update" to save the updated information.
- Navigate to General Settings > Designation:
To Check Daily Attendance:
- Navigate to Attendance > Daily Attendance:
- Click on the "Attendance" option in the main menu, then select "Daily Attendance" from the submenu.
- Define Date Range and Year:
- Select the start and end dates for the reporting period by specifying the date range from-to.
- Choose the desired year from the available options.
- Specify Filter Criteria:
- Choose the branch, department, shift, designation, grade, mode, status and type as needed to filter the data.
- View Details:
- Click on the "VIEW" button to generate and display the daily details report based on the selected criteria.
Adding a New Designation:
- Navigate to General Settings > Designation:
- Access the General Settings menu, then select "Designation."
- Click New:
- Select the "New" option to add a new designation.
- Enter Designation Name:
- Provide the name for the new designation in the designated field.
- Provide the name for the new designation in the designated field.
- Save Changes:
-
- After entering the designation name, click "Save" to add the new designation.
- Navigate to Inbox and Late In/Early Out tab:
- Click on the "Inbox" option in the main menu and select Late In/Early out tab.
- Filter pending applications:
- Filter application from the filter icon, and filter from person name, date range, approver and recommender.
- Take action
- Once filtered take necessary action for the required applicant. You can choose to recommend/disapprove OR, approve/disapprove the application depending upon the permission given to you.
- Navigate to General Settings > Designation:
- Access the General Settings menu, then select "Designation".
- Click Delete:
- Find the designation record you want to delete and click on the "Delete" option.
- Confirm Deletion:
- Confirm the deletion by clicking "OK.
- Navigate to Inbox and Official Visit Application tab:
- Click on the "Inbox" option in the main menu and select Official Visit Application tab.
- Filter pending applications:
- Filter application from the filter icon, and filter from person name, date range, approver and recommender.
- Take action
- Once filtered take necessary action for the required applicant. You can choose to recommend/disapprove OR, approve/disapprove the application depending upon the permission given to you.
Adding a New Job Grade:
- Navigate to General Settings > Job Grades:
- Access the General Settings menu, then select "Job Grades."
- Click New:
- Select the "New" option to add a new Job Grade.
- Enter Grade Name:
- Provide the name for the new Job Grade in the designated field.
- Provide the name for the new Job Grade in the designated field.
- Save Changes:
- After entering the Grade name, click "Save" to add the new Job Grade.
- Navigate to Inbox and Leave Application tab:
- Click on the "Inbox" option in the main menu and select Leave Application tab.
- Filter pending applications:
- Filter application from the filter icon, and filter from person name, date range, approver and recommender.
- Take action
- Once filtered take necessary action for the required applicant. You can choose to recommend/disapprove OR, approve/disapprove the application depending upon the permission given to you.
Editing a Job Grade:
-
- Navigate to General Settings > Job Grades:
- Access the General Settings menu, then select "Job Grades".
- Click Edit:
- Find the Grade record you want to edit and click on the "Edit" option.
- Make Necessary Changes:
- Update the Job Grade name or any other details as needed.
- Save Changes:
- After making the necessary changes, click "Update" to save the updated information.
- Navigate to General Settings > Job Grades:
To view the Official Visit Summary Report:
- Navigate to Leave & Visit > Official Visit Summary:
- Click on the "Leave & Visit" option in the main menu, then select "Official Visit Summary" from the submenu.
- Specify Date and Filter Criteria:
- Choose the Year.
- Select start and end dates for the reporting period by specifying the date range from-to.
- Select the official visit name, person name, designation, grade, mode, status, type, and job level as needed to filter the data.
- Choose the Year.
- View Report:
- Click on the "VIEW" button to generate and display the official visit summary report based on the selected criteria.
- Navigate to General Settings > Job Grades:
- Access the General Settings menu, then select "Job Grades".
- Click Delete:
- Find the Job grade record you want to delete and click on the "Delete" option.
- Confirm Deletion:
- Confirm the deletion by clicking "OK.
To view the Leave summary:
- Navigate to Leave & visit > Leave Summary:
- Click on the "Leave & visit" option in the main menu, then select "Leave Summary" from the submenu.
- Specify Date Range and Filter Criteria:
- Choose the Year and Select the office name, person name, designation, grade, mode, status, type, and job level as needed to filter the data.
- Select start and end dates for the reporting period by specifying the date range from-to.
- View Report:
- Click on the "VIEW" button to generate and display the leave summary report based on the selected criteria.
Adding a New Job Type:
- Navigate to General Settings > Job Types:
- Access the General Settings menu, then select "Job Types."
- Click New:
- Select the "New" option to add a new Job Type.
- Enter Job Type Name:
- Provide the name for the new Job type in the designated field.
- Provide the name for the new Job type in the designated field.
- Save Changes:
- After entering the Grade name, click "Save" to add the new Job Type.
- Navigate to Personal Attendance:
- Access the "Personal Attendance" section from the main menu.
- Select Parameters:
- Choose the person's name for whom you want to view the attendance report. (It will be available if you have permission to view data from other offices.)
- Specify the desired year and month for the attendance records.
- Generate Report:
- After selecting the parameters, click on the "View Report".
- Review Attendance Records:
- Users can view details such as attendance dates, shift hours, overtime, and any other relevant information recorded for each day.
Editing a Job Type:
-
- Navigate to General Settings > Job Types:
- Access the General Settings menu, then select "Job Types".
- Click Edit:
- Find the job type record you want to edit and click on the "Edit" option.
- Make Necessary Changes:
- Update the Job type name or any other details as needed.
- Save Changes:
- After making the necessary changes, click "Update" to save the updated information.
- Navigate to General Settings > Job Types:
To view the Official Visit Summary Report:
- Navigate to Leave & Visit > Official Visit Summary:
- Click on the "Leave & Visit" option in the main menu, then select "Official Visit Summary" from the submenu.
- Specify Date and Filter Criteria:
- Choose the Year.
- Select start and end dates for the reporting period by specifying the date range from-to.
- Select the official visit name, person name, designation, grade, mode, status, type, and job level as needed to filter the data.
- Choose the Year.
- View Report:
- Click on the "VIEW" button to generate and display the official visit summary report based on the selected criteria.
- Navigate to General Settings > Job types:
- Access the General Settings menu, then select "Job Types".
- Click Delete:
- Find the Job type record you want to delete and click on the "Delete" option.
- Confirm Deletion:
- Confirm the deletion by clicking "OK.
To view the Leave summary:
- Navigate to Leave & visit > Leave Summary:
- Click on the "Leave & visit" option in the main menu, then select "Leave Summary" from the submenu.
- Specify Date Range and Filter Criteria:
- Choose the Year and Select the office name, person name, designation, grade, mode, status, type, and job level as needed to filter the data.
- Select start and end dates for the reporting period by specifying the date range from-to.
- View Report:
- Click on the "VIEW" button to generate and display the leave summary report based on the selected criteria.
Adding a New Job Mode:
- Navigate to General Settings > Job Modes:
- Access the General Settings menu, then select "Job Modes."
- Click New:
- Select the "New" option to add a new Job Mode.
- Enter Job Mode Name:
- Provide the name for the new Job mode in the designated field.
- Provide the name for the new Job mode in the designated field.
- Save Changes:
- After entering the Job mode name, click "Save" to add the new Job mode.
Monthly Attendance Report provides a comprehensive overview of attendance data for a specified period. To generate this report:
- Navigate to Attendance > Monthly Attendance:
- Access the Monthly Attendance section within the Attendance menu.
- Specify Date Range and Filter Criteria:
- Select the start and end dates for the reporting period.
- Choose the year, office, person name, designation, grade, mode, status, type, and job level as per your requirements.
- View Report:
- Click on the "VIEW" button to generate the monthly attendance report based on the selected parameters.
Editing a Job Mode:
-
- Navigate to General Settings > Job Modes:
- Access the General Settings menu, then select "Job Modes".
- Click Edit:
- Find the job mode record you want to edit and click on the "Edit" option.
- Make Necessary Changes:
- Update the Job mode name or any other details as needed.
- Save Changes:
- After making the necessary changes, click "Update" to save the updated information.
- Navigate to General Settings > Job Modes:
- Navigate to Application > Leave Application:
- Click on the "Application" option in the main menu, then select "Leave Application" from the submenu.
- Fill Out Leave Details:
- Select the type of leave, From Date and To Date, Reason, Approver and recommender.
- Submit Leave Application:
After filling out the necessary details, click on the "Apply" button to submit your leave application.
- Navigate to General Settings > Job Modes:
- Access the General Settings menu, then select "Job Modes".
- Click Delete:
- Find the Job mode record you want to delete and click on the "Delete" option.
- Confirm Deletion:
- Confirm the deletion by clicking "OK.
- Navigate to Inbox and Late In/Early Out Application tab:
- Click on the "Inbox" option in the main menu and select Late In/Early Out Application tab.
- Filter pending applications:
- Filter application from the filter icon, and filter from person name, date range, approver and recommender.
- Take action
- Once filtered take necessary action for the required applicant. You can choose to recommend/disapprove OR, approve/disapprove the application depending upon the permission given to you.
To add new leave , follow these steps:
- Navigate to Leave Settings:
- Access the Leave Settings section in the eAttendance software and select leave types.
- Click New:
- Select the "New" option to add a new leave type.
- Enter Type Name:
- Provide a name for the new leave type in the designated field.
- Save Changes:
- After entering the type name, click "Save" to add the new leave type.
By following these steps, you can effectively configure new leave types, providing employees with accurate options for requesting time off.
- Navigate to Inbox and Official Visit Application tab:
- Click on the "Inbox" option in the main menu and select Official Visit Application tab.
- Filter pending applications:
- Filter application from the filter icon, and filter from person name, date range, approver and recommender.
- Take action
- Once filtered take necessary action for the required applicant. You can choose to recommend/disapprove OR, approve/disapprove the application depending upon the permission given to you.
To edit leave types , follow these steps:
- Navigate to Leave Settings:
- Access the Leave Settings section in the eAttendance software and select leave types.
- Click Edit:
- Fined the leave type you want to edit and click on the "Edit" option.
- Make Necessary Changes:
- Update the leave type name or any other details as needed.
- Save Changes:
- After making the necessary changes, click "Save" to save the updated information.
By following these steps, you can effectively configure new leave types, providing employees with accurate options for requesting time off.
- Navigate to Inbox and Leave Application tab:
- Click on the "Inbox" option in the main menu and select Leave Application tab.
- Filter pending applications:
- Filter application from the filter icon, and filter from person name, date range, approver and recommender.
- Take action
- Once filtered take necessary action for the required applicant. You can choose to recommend/disapprove OR, approve/disapprove the application depending upon the permission given to you.
To delete a leave type , follow these steps:
- Navigate to Leave Settings > Leave Types:
- Access the Leave Settings section and select "Leave types".
- Click Delete:
- Find the leave type record you want to delete and click on the "Delete" option
- Confirm deletion:
- Confirm the deletion by clicking "OK.
To view the Official Visit record:
- Navigate to Leave & Visit > Official Visit Summary:
- Click on the "Leave & Visit" option in the main menu, then select "Official Visit Summary" from the submenu.
- Specify Date and Filter Criteria:
- Choose the Year.
- Select start and end dates for the reporting period by specifying the date range from-to.
- Select the official visit name, person name, designation, grade, mode, status, type, and job level as needed to filter the data.
- Choose the Year.
- View Report:
- Click on the "VIEW" button to generate and display the official visit summary report based on the selected criteria.
To add new Official visit type, follow these steps:
- Navigate to Leave Settings:
- Access the Leave Settings section and select Official Visit types.
- Click New:
- Select the "New" option to add a new official visit type.
- Enter Type Name:
- Provide a name for the new official visit type in the designated field.
- Save Changes:
- After entering the type name, click "Save" to add the new official visit type.
By following these steps, you can effectively configure new official visit types.
To view the Leave record:
- Navigate to Leave & Visit > Leave Summary:
- Click on the "Leave & Visit" option in the main menu, then select "Leave Summary" from the submenu.
- Specify Date and Filter Criteria:
- Choose the Year.
- Select start and end dates for the reporting period by specifying the date range from-to.
- Select the official visit name, person name, designation, grade, mode, status, type, and job level as needed to filter the data.
- Choose the Year.
- View Report:
- Click on the "VIEW" button to generate and display the leave summary report based on the selected criteria.
To edit official visit types , follow these steps:
- Navigate to Leave Settings:
- Access the Leave Settings section and select "Official visit types".
- Click Edit:
- Find the official visit type you want to edit and click on the "Edit" option.
- Make Necessary Changes:
- Update the official visit type name or any other details as needed.
- Save Changes:
- After making the necessary changes, click "Save" to save the updated information.
- Navigate to Personal Attendance:
- Access the "Personal Attendance" section from the main menu.
- Select Parameters:
- Choose the person's name for whom you want to view the attendance report. (It will be available if you have permission to view data from other offices.)
- Specify the desired year and month for the attendance records.
- Generate Report:
- After selecting the parameters, click on the "View Report".
- Review Attendance Records:
- Users can view details such as attendance dates, shift hours, overtime, and any other relevant information recorded for each day.
To delete an Official visit type , follow these steps:
- Navigate to Leave Settings > Official Visit Types:
- Access the Leave Settings section and select "Official Visit types".
- Click Delete:
- Find the official visit type record you want to delete and click on the "Delete" option
- Confirm deletion:
- Confirm the deletion by clicking "OK.
To add new Holiday, follow these steps:
- Navigate to Attendance Settings:
- Access the Attendance Settings section and select "Public Holidays".
- Click New:
- Select the "New" option to add a new holiday.
- Enter Type Name:
- Provide a name for the new holiday in the designated field.
- Save Changes:
- After entering the holiday name, click "Save" to add the new public holiday.
By following these steps, you can effectively configure new public holidays.
To edit Public holiday , follow these steps:
- Navigate to Attendance Settings:
- Access the Attendance Settings section and select "Public Holidays".
- Click Edit:
- Find the public holiday you want to edit and click on the "Edit" option.
- Make Necessary Changes:
- Update the holiday name or any other details as needed.
- Save Changes:
- After making the necessary changes, click "Save" to save the updated information.
To delete a public holiday, follow these steps:
- Navigate to Attendance Settings > Public Holidays:
- Access the Attendance Settings section and select "Public Holidays".
- Click Delete:
- Find the holiday you want to delete and click on the "Delete" option.
- Confirm deletion:
- Confirm the deletion by clicking "OK.
To add new Shift, follow these steps:
- Navigate to Attendance Settings > Shift Hours:
- Access the Attendance Settings section and select "Shift Hours".
- Click Add:
- Select the "Add" option to add a new shift.
- Enter Shift hours:
- Provide a name for the new shift in the designated field and fill out necessary information.
- Save Changes:
- After entering the necessary information, click "Save" to add new shift hours.
By following these steps, you can effectively configure new shift hours.
To edit a shift, follow these steps:
- Navigate to Attendance Settings > Shift Hours:
- Access the Attendance Settings section and select "Shift Hours".
- Click Edit:
- Find the shift hour you want to edit and click on the "Edit" option.
- Make Necessary Changes:
- Update the shift name or any other details as needed.
- Save Changes:
- After making the necessary changes, click "Save" to save the updated information.
To delete a shift, follow these steps:
- Navigate to Attendance Settings > Shift Hours:
- Access the Attendance Settings section and select "Shift Hours".
- Click Delete:
- Find the shift hours you want to delete and click on the "Delete" option.
- Confirm deletion:
- Confirm the deletion by clicking "OK.
To add a new Attendance year, follow these steps:
- Navigate to Attendance Settings > Attendance Year:
- Access the Attendance Settings section and select "Attendance Year".
- Click New:
- Select the "New" option to add a new attendance year.
- Enter Attendance Year:
- Provide a name for the new attendance year in the designated field and fill out necessary information.
- Save Changes:
- After entering the necessary information, click "Save" to add new attendance year.
By following these steps, you can effectively configure new attendance year.
To edit Attendance year, follow these steps:
- Navigate to Attendance Settings > Attendance Year:
- Access the Attendance Settings section and select "Attendance Year".
- Click Edit:
- Find the attendance year you want to edit and click on the "Edit" option.
- Make Necessary Changes:
- Update the attendance year or any other details as needed.
- Save Changes:
- After making the necessary changes, click "Save" to save the updated information.
To delete Attendance year, follow these steps:
- Navigate to Attendance Settings > Attendance Year:
- Access the Attendance Settings section and select "Attendance Year".
- Click Delete:
- Find the attendance year you want to delete and click on the "Delete" option.
- Confirm deletion:
- Confirm the deletion by clicking "OK.
- Navigate to General Settings > Authorized Persons:
- Access the General Settings menu, then select "Authorized Persons."
- Select Branch, department other parameters:
- Choose the relevant branch, department and other parameters for which you want to designate authorized persons.
- Check Desired Checkbox:
- In the list of individuals displayed, click on the checkbox next to the names of those you wish to designate as leave approvers or leave recommenders.
- Save Changes:
- After selecting the desired checkboxes, click "Save" to confirm the designations.
To activatea user, follow these steps:
- Navigate to General Settings > User Permission:
- Access the General Settings menu, then select "User Permission."
- Activate User:
- Click on the lock/unlock image to toggle between active and inactive status for the user.
- Save Changes:
- After making the necessary adjustments, save the changes to update the user's status.
By following these steps, you can easily activate users as needed, ensuring efficient management of user accounts within the system.
To Change a user to admin, follow these steps:
- Navigate to General Settings > User Permission:
- Access the General Settings menu, then select "User Permission."
- Select User:
- Search for the user you want to change the role of, and click on pencil icon to edit the "User group".
- Change User Type and Save:
- Change user type to "Administrator" and make other necessary adjustments, save the changes to update the user's status.
By following these steps, you can easily change user's role as needed, ensuring efficient management of user accounts within the system.
To reset a user's password, follow these steps:
- Navigate to General Settings > User Permission:
- Access the General Settings menu, then select "User Permission."
- Access Password Settings:
- Click on the "reset password" option to access the password settings.
- Reset Password:
- Then, click on the key image to initiate the password reset process for the user.
By following these steps, you can securely reset passwords for users, ensuring account security and accessibility within the system.
- Navigate to General Settings > Company Details:
- Access the General Settings menu, then select "Company Details."
- Enter Company Details:
- Fill in all the necessary details such as company name, address, contact information, and any other relevant information.
- Upload Logo (Optional):
- You have the option to upload your company logo, which will be displayed in the heading of all reports when printed.
- Save Changes:
- After filling in all the details, click "Save" to apply the changes.
To add a user's missing attendance, follow these steps:
- Navigate to Attendance > Manage Attendance:
- Access the Attendance in the menu, then select "Manage attendance".
- Access Add Attendance tab:
- Click on the "Add attendance" tab.
- Fill out the record with necessary details.
- Save record:
- Then, click on the "Save" button to save the record.
By following these steps, you can add missing attendance of users.
To edit a user's attendance, follow these steps:
- Navigate to Attendance > Manage Attendance:
- Access the Attendance in the menu, then select "Manage attendance".
- Access Edit Attendance tab:
- Click on the "Add attendance" tab.
- Choose the person's name for whom you want to edit the attendance record and click "View".
- Click on the "More option icon and click "Edit".
- Save record:
- Make necessary changes then, click on the "Save" icon to save the record.
By following these steps, you can edit attendance of users.
To add New Leave Record, follow these steps:
- Navigate to Leave & Visit > Leave Posting:
- Access the Leave Posting section within the Leave & Visit menu.
- Select Add New Tab:
- Click on the Add New tab to add a new leave record.
- Enter Details:
- Choose the person for whom you want to add the leave record.
- Specify the fiscal year, leave name, and the number of days.
- Click Save:
- After entering the necessary details, click "Save" to create the new leave record.
- Search for Leave Record:
- Use the search function to locate the leave record you want to edit or delete.
- Edit Leave Record:
- Click on the leave record to open it for editing.
- Modify the necessary details.
- Click "Save" to update the leave record.
- Navigate to Leave & Visit > Leave Posting:
- Access the Leave Posting section within the Leave & Visit menu.
- Access Pending Leave Records:
- Navigate to the Pending tab within the Leave Posting section.
- View Pending Leave Records:
- Here, you can see leave records that are pending approval.
- Take Action:
- You can choose to delete pending leave records or send them for approval.
- Navigate to Leave & Visit > Official Visit Posting:
- Access the Official Visit Posting section within the Leave & Visit menu.
- Select Add New Tab:
- Click on the Add New tab to add a new official visit record.
- Enter Details:
- Choose the person for whom you want to add the official visit record.
- Specify the fiscal year, visit type, and other relevant details.
- Click Save:
- After entering the necessary details, click "Save" to create the new official visit record.
- Navigate to Leave & Visit > Official Visit Posting:
- Access the Official Visit Posting section within the Leave & Visit menu.
- Select Search or Edit Office Out Tab:
- Click on the Search or Edit Office Out tab.
- Search for Official Visit Record:
- Use the search function to locate the official visit record you want to edit or delete.
- Edit Official Visit Record:
- Click on the official visit record to open it for editing.
- Modify the necessary details.
- Click "Save" to update the official visit record.
- Navigate to Leave & Visit > Official Visit Posting:
- Access the Official Visit Posting section within the Leave & Visit menu.
- Access Pending Official Visit Records:
- Navigate to the Pending tab within the Official Visit Posting section.
- View Pending Official Visit Records:
- Here, you can see official visit records that are pending approval.
- Take Action:
- You can choose to delete pending official visit records or send them for approval.
Adding Entitled Leave:
- Navigate to Leave & Visit > Entitled Leave:
- Access the Entitled Leave section within the Leave & Visit menu.
- Click New:
- Select the option to add a new entitled leave entry.
- Enter Leave Details:
- Select Attendance year, date type, leave type and person name and click "New " button.
- Save Changes:
- After entering the necessary details, click "Save" to create the new entitled leave entry.
Viewing Entitled Leave:
- Navigate to Leave & Visit > Entitled Leave:
- Access the Entitled Leave section within the Leave & Visit menu.
- Select Search tab:
- In the search tab, search the entitled leave entry you want to view by required filters.
- Click View:
- Select View to see the record in detail.
Editing Entitled Leave:
- Navigate to Leave & Visit > Entitled Leave:
- Access the Entitled Leave section within the Leave & Visit menu.
- Identify Leave Entry to Edit:
- In the search tab, search the entitled leave entry you want to edit.
- Click Edit:
- Select the option to edit the entitled leave entry.
- Make Necessary Changes:
- Modify the type name or any other details as needed.
- Save Changes:
- After making the necessary edits, click "Save" to update the entitled leave entry.
Deleting Entitled Leave:
- Navigate to Leave & Visit > Entitled Leave:
- Access the Entitled Leave section within the Leave & Visit menu.
- Identify Leave Entry to Delete:
- Locate the entitled leave entry you wish to delete from the list.
- Click Delete:
- Select the option to delete the entitled leave entry.
- Confirm Deletion:
- Confirm the deletion when prompted.
Adding Opening Leave:
- Navigate to Leave & Visit:
- Access the Leave & Visit section in the menu.
- Go to Opening Leave:
- Click on the Opening Leave option.
- Click New:
- Select the option to add a new opening leave entry and press NEW.
- Enter Leave Days:
- Select Date and days. The selected date should fall under the Attendance Year.
- Save Changes:
- After entering the necessary details, click "Save" to create the new opening leave
Viewing Opening Leave:
- Navigate to Leave & Visit > Opening Leave:
- Access the Opening Leave section within the Leave & Visit menu.
- Select Search tab:
- In the search tab, search the Opening leave entry you want to view by required filters.
- Click View:
- Select View to see the record in detail.
Editing Opening Leave:
- Navigate to Leave & Visit:
- Access the Leave & Visit section in the menu.
- Go to Opening Leave:
- Click on the Opening Leave option/ Search Tab.
- Identify Leave Entry to Edit:
- Locate the opening leave entry you want to edit from the list.
- Click Edit:
- Select the option to edit the opening leave entry.
- Make Necessary Changes:
- Modify the type name or any other details as needed.
- Save Changes:
- After making the necessary edits, click "Save" to update the opening leave entry.
Deleting Opening Leave:
- Navigate to Leave & Visit:
- Access the Leave & Visit section in the menu.
- Go to Opening Leave:
- Click on the Opening Leave option.
- Identify Leave Entry to Delete:
- Locate the opening leave entry you wish to delete from the list.
- Click Delete:
- Select the option to delete the opening leave entry.
- Confirm Deletion:
- Confirm the deletion when prompted.
To manage the OT (Overtime) posting:
- Navigate to Attendance > Overtime Posting:
- Click on the "Attendance" option in the main menu, then select "Overtime Posting" from the submenu.
- Specify Date Range and Filter Criteria:
- Choose person name, start and end dates for the reporting period by specifying the date range from-to.
- Select Additional Filter Criteria (Optional):
- Optionally, select the branch and department to further filter the data.
- View Report:
- Click on the "VIEW" button to generate and display the OT Report based on the selected criteria.
To add a user's holiday/day off working, follow these steps:
- Navigate to Attendance > Manage Attendance:
- Access the Attendance in the menu, then select "Manage attendance".
- Access Add Attendance tab:
- Click on the "Add attendance" tab.
- Fill out the record with necessary details.
- Save record:
- Then, click on the "Save" button to save the record.
By following these steps, you can add missing holiday/Day off working of users.
- Go to Posting > Personwise Weekend
- Select Person Name > (Date Type) > Year > Month
- Click View
- Click on desired checkbox to make weekend for the selected month
Then, click Save
- Go to Posting > Data Import
- Click Browse to upload the attendance data
Note: The file format should be in xml format
To Check Daily Attendance:
-
- Navigate to Attendance > Daily Attendance:
- Click on the "Attendance" option in the main menu, then select "Daily Attendance" from the submenu.
- Specify Filter Criteria:
- On the "SIngle Day" tab choose the branch, department, shift, designation, grade, mode, status and type as needed to filter the data.
- Define Date:
- Select the date for the reporting period by specifying the date .
- Choose the desired year from the available options.
- View Details:
- Click on the "VIEW" button to generate and display the daily attendance report based on the selected criteria.
- Navigate to Attendance > Daily Attendance:
The Daily Absent Summary Report offers a detailed overview of employee absences for a specified time frame. To access and review this report:
-
- Navigate to Attendance > Daily Absent:
- Locate and select the Daily Absent option within the Attendance menu.
- Specify Date Range and Filter Criteria:
- Define the start and end dates to set the reporting period.
- Choose the person name, branch, department to focus the report on specific individuals, branches or departments.
- View Report:
- Click the "VIEW" button to generate and display the Daily Absent Report, providing insights into employee absences for the selected time frame and criteria.
- Navigate to Attendance > Daily Absent:
Monthly Attendance Report provides a comprehensive overview of attendance data for a specified period. To generate this report:
- Navigate to Attendance > Monthly Attendance:
- Access the Monthly Attendance section within the Attendance menu.
- Specify Date Range and Filter Criteria:
- Select the start and end dates for the reporting period.
- Choose the year, office, person name, designation, grade, mode, status, type, and job level as per your requirements.
- View Report:
- Click on the "VIEW" button to generate the monthly attendance report based on the selected parameters.
To view the Leave summary:
- Navigate to Leave & visit > Leave Summary:
- Click on the "Leave & visit" option in the main menu, then select "Leave Summary" from the submenu.
- Specify Date Range and Filter Criteria:
- Choose the Year and Select the office name, person name, designation, grade, mode, status, type, and job level as needed to filter the data.
- Select start and end dates for the reporting period by specifying the date range from-to.
- View Report:
- Click on the "VIEW" button to generate and display the leave summary report based on the selected criteria.
To view the Official Visit Summary Report:
- Navigate to Leave & Visit > Official Visit Summary:
- Click on the "Leave & Visit" option in the main menu, then select "Official Visit Summary" from the submenu.
- Specify Date and Filter Criteria:
- Choose the Year.
- Select start and end dates for the reporting period by specifying the date range from-to.
- Select the official visit name, person name, designation, grade, mode, status, type, and job level as needed to filter the data.
- Choose the Year.
- View Report:
- Click on the "VIEW" button to generate and display the official visit summary report based on the selected criteria.
The Annual Attendance Report provides a comprehensive overview of employee attendance throughout the year. Follow these steps to access and review the report:
- Navigate to Attendance > Annual Attendance:
- Locate and select the Annual Attendance option within the Attendance menu.
- Specify Filter Criteria:
- Select the person's name and the year for which you want to generate the report.
- View Report:
- Click the "Reports " button to generate and display the Annual Summary Report, offering insights into employee attendance patterns and trends over the selected year.
- Navigate to Application > Official Visit Application:
- Click on the "Application" option in the main menu, then select "Official Visit Application" from the submenu.
- Provide Visit Details:
- Enter the purpose and details of your official visit.
- Specify the start date and end date of your visit.
- Select Approver and Recommender:
- Choose the appropriate approver and recommender for your official visit application.
- Submit Official Visit Application:
- Once you have filled out all the required information, click on the "Apply" button to submit your official visit application.
- Navigate to Application > Late In/Early out Application:
- Click on the "Application" option in the main menu, then select "Late In/Early out Application" from the submenu.
- Provide late In/Early Out Details:
- Enter the purpose and details of your Late In/Early out visit.
- Specify the reason of you Late In/Early out.
- Select Approver and Recommender:
- Choose the appropriate approver and recommender for your Late In/Early out visit application.
- Submit Late In/Early out visit Application:
- Once you have filled out all the required information, click on the "Apply" button to submit your Late In/Early out visit application.
The Annual Attendance Report provides a comprehensive overview of employee attendance throughout the year. Follow these steps to access and review the report:
- Navigate to Attendance > Annual Attendance:
- Locate and select the Annual Attendance option within the Attendance menu.
- Specify Filter Criteria:
- Select the person's name and the year for which you want to generate the report.
- View Report:
- Click the "Reports " button to generate and display the Annual Summary Report, offering insights into employee attendance patterns and trends over the selected year.
To add a new employee profile, follow these steps:
- Navigate to Personal Details Menu:
- Access the Personal Details menu within the system.
- Click Add New Person:
- Select the option to add a new employee profile.
- Enter Employee Details:
- Fill in the required fields with the employee's personal information, contact details, and other relevant data.
- Save Changes:
- After entering all necessary details, click "Save" to create the new employee profile.
Viewing Employee Profile:
- Navigate to Personal Details Menu:
- Access the Personal Details menu.
- Select Search tab:
- In the search tab, search the person you want to view.
Updating Employee Profile:
- Navigate to Personal Details Menu:
- Access the Personal Details menu within the system.
- Select Employee to Update:
- Identify the employee profile you want to update and click on it to proceed.
- Make Necessary Changes:
- Modify the fields as needed to update the employee's information.
- Save Changes:
- After making the necessary edits, click "Save" to update the employee profile.
Deleting Employee Profile:
To delete an employee profile, follow these steps:
- Navigate to Personal Details Menu:
- Access the Personal Details menu within the system.
- Identify Employee to Delete:
- Locate the employee profile you wish to delete from the list.
- Click Delete:
- Select the option to delete the employee profile.
- Confirm Deletion:
- Confirm the deletion when prompted.
Monthly Attendance Report provides a comprehensive overview of attendance data for a specified period. To generate this report:
- Navigate to Attendance > Monthly Attendance:
- Access the Monthly Attendance section within the Attendance menu.
- Specify Date Range and Filter Criteria:
- Select the start and end dates for the reporting period.
- Choose the year, office, person name, designation, grade, mode, status, type, and job level as per your requirements.
- View Report:
- Click on the "VIEW" button to generate the monthly attendance report based on the selected parameters.
- Navigate to Personal Leave Record:
- Access the "Personal Leave Record" section from the main menu.
- Select Parameters:
- Choose your name or the name of the person for whom you want to view the leave record. (It will be available if you have permission to view data from other offices.)
- Specify the desired year and leave name for the leave records.
- Generate Record:
- After selecting the parameters, click on the "View" button.
- Navigate to Personal Official Visit:
- Access the "Personal Official Visit" section from the main menu.
- Select Parameters:
- Choose your name or the name of the person for whom you want to view the official visit report. (It will be available if you have permission to view data from other offices.)
- Specify the desired year and visit name for the official visit records.
- Generate Report:
- After selecting the parameters, click on the "View".
- Go to Menu > User Manage > Enroll User > Enroll FP or Enroll Card or Enroll Password > New Enroll - OK
- Place Finger (three times) > OK
- Go to Menu > User Manage > Delete > OK
- Go to Menu > Options > Common Opt > IP Address
- Click OK
- Go to Menu > Options > Auto Test > Voice Test
- Click OK then, (choose the voice accordingly)
- Go to Menu > Options > System Options > Adv Options > Voice
- Click OK then, (Y/N options display-choose accordingly)
- Go to Menu > Options > System options > Adv Options > Adj VOL (%) ____
(use up button to increase the volume and use down button to decrease the volume )
- Go to Menu > Options > System Options > Date Time
- Click OK
- Go to Menu > Options > System Option > Fmt > OK
(Use Up and Down Button to change the date format)
- Go to Menu > Options > System Option > Adv Option > Del Attlogs
(Make sure all the data is fully retrieved in attendance system before deleting.)
- Go to Menu > User Manage > Browser AttLogs
- You need to press M/OK button for minimum 3 seconds for Menu options. The button is same for Menu options and OK.
- Press M/OK button for 3 seconds > user Mng > New User > Set ID.NO > no need to enter the Name > purview (User or Admin) > select FP (Enroll FP) or Enroll Card or Enroll Password > choose OK > Press Finger (same finger for 3 times) > press Esc button > OK (M/ <-) > OK
NOTE 1: The device allows FP number count up to 10 fingers. This is for alternate option whenever the present finger doesn’t work.
NOTE 2: Purview (User): This enroll is for Employees.
Purview (Admin): This enroll is for Admin. Once, you enroll the finger print of Admin,
selecting Purview (Admin), after on the Menus of device cannot be
used without fingerprint permission of Admin. This is for datas
security in device.
PWD (Enroll PWD) : This options allows to keep password for entering the Menus of
the device.
NOTE 3: Keeping Admin and Password doesn’t mean that the device won’t allow doing attendance. These options are to keep entered data secure.
- Press M/OK > User Mng > Manage
- M/OK > User Mng > Manage > M/Ok > Search User
- M/OK > User Mng > Manage > M/OK > choose user (if you can’t find the user ID No., use Search User option) > Record
- M/OK > User Mng > Manage > choose user ID > M/OK > Edit > FP (Enroll FP) > OK
Press finger accordingly, and then click Save.
- M/OK > User Mng > Manage > choose User ID > M/OK > Del User > Delete User or Delete Fingerprint > M/OK > OK
- M/OK > Comm. > Network > then, you can find the IP Address, Subnet mask, Gateway of Device
- M/OK > System > System > choose Date Fmt > OK
- M/OK > System > System > Voice (ON/OFF) > OK
- M/OK > System > System > Vol. (%) > OK
- M/OK > System > Data Mng > Delete Attlog > OK (Make sure all the data is fully retrieved in attendance system before deleting)
- M/OK > Date/Time > change the date and time > OK
In the left side of device, you will find the place to fit the pendrive/USB.
- M/Ok > PenDrive > Download or Upload > Download Attlog > OK
- M/Ok > Pendrive > Download or Upload > Download User > OK
- M/OK > Record > select ID No. > select Start date to End date > OK
- M/OK > Sys Info > Device tab
- M/OK > Sys Info > OK